
I love making paneer. It makes me feel very competent. It’s one of the easiest—if not, the easiest—cheeses to make which makes it doubly worth it.
Simple enough: bring milk to the boil, add acid of some kind (lemon, yogurt or vinegar) and let the curds separate from the whey. Strain in a cheesecloth, et voilà! Cheese!
Wait, isn’t that how you make ricotta too? Although it’s fairly common to find recipes for paneer and ricotta used interchangeably, ricotta is technically cheese that is made by adding acid to leftover whey. Ricotta—Italian for ‘recooked’—is made by recooking the whey leftover from making other cheeses (most often, mozzarella.) Since some amount of protein still remains in the whey after making mozzarella, acid is added to extract the curds from it. This resulting cheese is ricotta. Speaking of technicalities though, some purists would argue that because of this two-step process, ricotta is not even a cheese but a by-product or derivative of it. (If you haven’t realized already, I’m all about the factoids!)
 Albeit quite straight-forward, the key to getting that perfect texture is in the details (hence the excessively detailed recipe below.) For example, continuing to boil the whey after the acid has been added to it makes the paneer very hard. I also find that making paneer with yogurt has resulted in the softest texture for me. And to achieve a soft-set paneer to be used in fritters etc, you want the texture to be creamy (not crumbly), so strain for a shorter period of time. I might be breaking some rules when I say this, but storing the paneer in its whey is something I swear by and can’t recommend enough.
| Servings |
yields 200-230 grams
|
- 500 ml full fat milk
- 1/2 cup yogurt
- Medium-sized pot
- Large sieve
- Large bowl
- Muslin or cheesecloth
- Weights, like a mortar
- Storage container
Ingredients
Equipment:
|
|
- Line the sieve with muslin or cheesecloth and place it over the bowl.
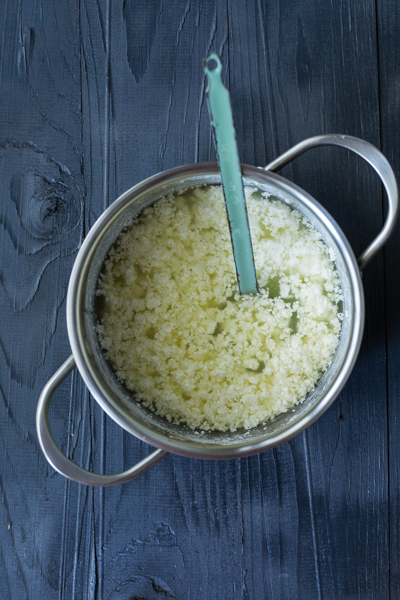
- Pour the milk into the pot and bring to the boil. Stir frequently to ensure it doesn’t scorch at the bottom.
- Once the milk has come to the boil, turn off the heat, move the pot away from the heat source and add the yogurt. You will notice the whey water separating from the curds. Let it stand for 3-4 minutes. (note: if the milk hasn’t separated, add a little more yogurt to help it along.)
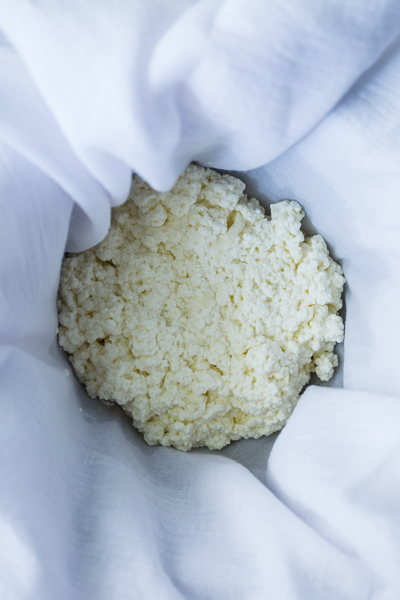
- Pour the mixture into the lined sieve and tie the ends of the cloth together. Retain the whey collected in the bowl. Don't press down or squeeze the paneer. Let it drain for 5 minutes.
- Use immediately or transfer the paneer to your storage container and top with the collected whey. Can be refrigerated for up to 2 days. Drain before using.
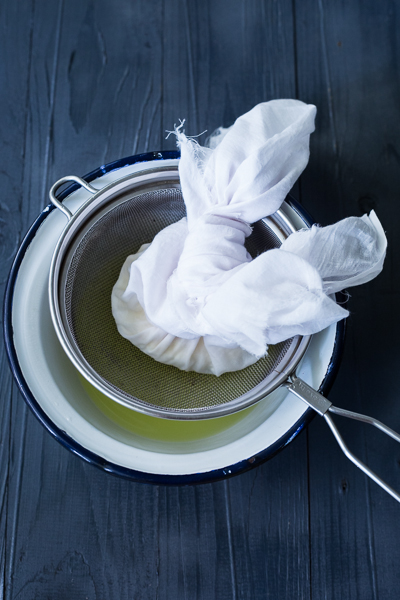
- Pour the mixture into the lined sieve and tie the ends of the cloth together. Drain for 10 minutes squeezing out the excess whey with your hands to help it along.
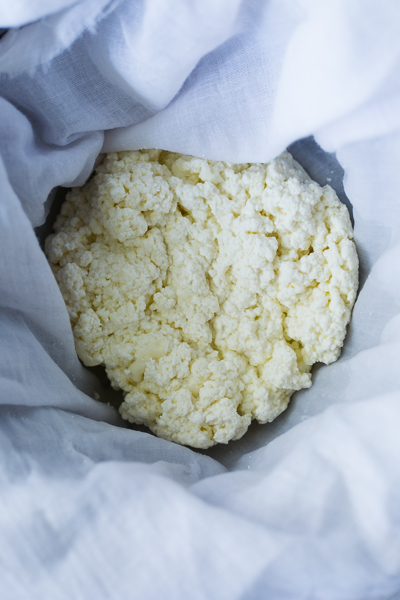
- Transfer the cheesecloth to a plate and flatten it out to a rough square with your hands. Weigh the cloth down with something heavy like a mortar and set it aside for a further 15 minutes. Cut into cubes. Can be kept refrigerated for up to 2 days.


Leave a Reply